This is a tutorial for upcycling some worn out jeans from my girls. I had this pile of jeans that had holes in the knees, but held a special attachment to my heart. The jeans these days are really cute with awesome details. For this clutch I used my daughters size 8 jeans with jewel details and really cute embroidery along the pockets.
The clutch is fully lined and I added a wrist handle. A zipper is used to close the clutch.
I used the same fabric for the lining as the wrist band. Have Fun! Here's the tutorial to make your own memories with a Mother's Clutch.
1. First cut out the back section of the jeans you want to use. You will have to use a seam ripper to detach the belt loops. This cut piece will be your pattern shape for the lining and back piece.
2. The next step is to take the front piece (which is really the backside of the jeans) and use it to cut the back piece. For this piece I opened up the leg of the jeans and cut out the pattern.
3. Now cut out two pieces of fabric for the lining. I used some colorful scrap fabric for the lining. Make sure you have enough for two pieces and the wrist handle.
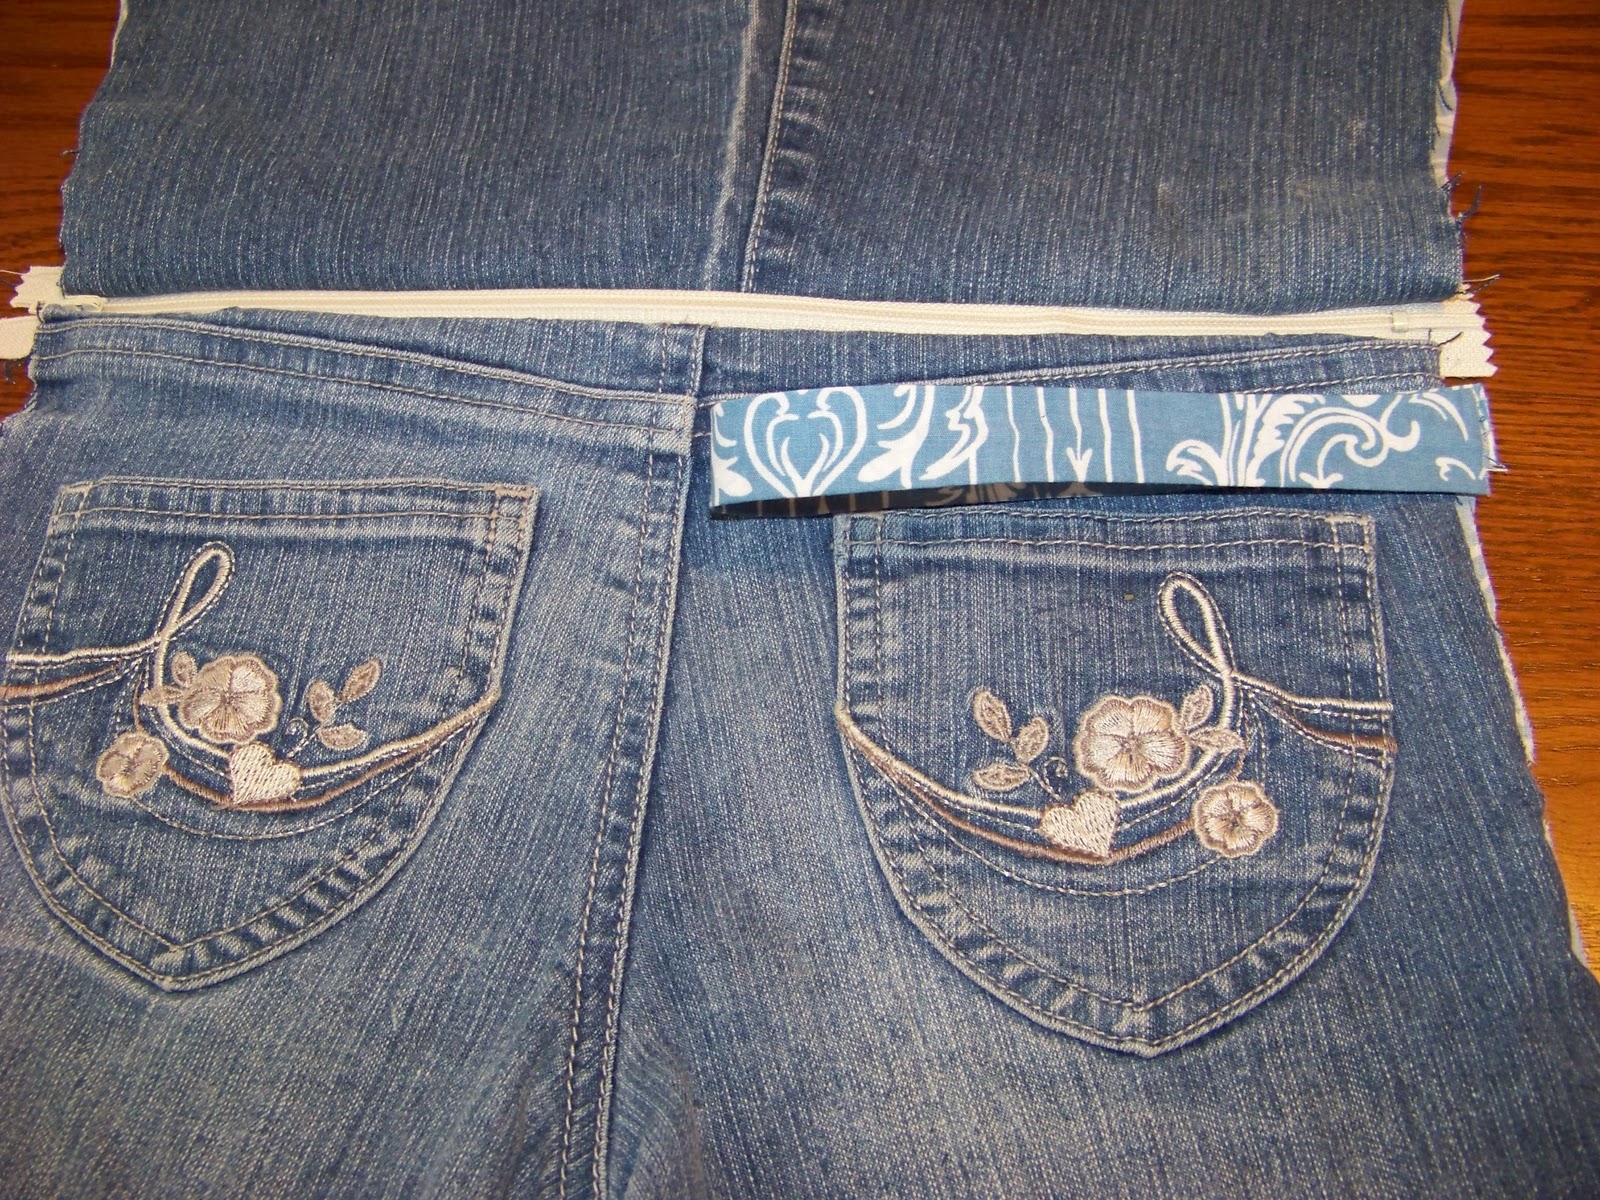
4. Now take your front piece and pin on the zipper. I used a 14 inch length of white zipper for this clutch. I buy them bigger because I never know what size I will make the clutches. It's very easy to cut of the excess. Pin the zipper on with the wrong size of zipper OUT. The rights sides of the zipper and the jeans should be facing each other.
5. Stitch the zipper to front using a 1/4" seam.
6. The next part is pinning the lining to the zipper. The right side of lining fabric should face the right side of jeans.
7. Stitch the lining using a 1/4" seam.
Here's what it should look like after stitching.
8. Pin the back side of jeans to the zipper. The picture below will help you align the correct side to the zipper. The zipper is wrong side OUT like before.
9. Stitch the back piece to the zipper using a 1/4" seam.
10. Pin the last piece of lining to the zipper for the back side of fabric. Use the picture for better reference. Stitch the lining using a 1/4" seam like before.
11. Open out the clutch. This is what it should look like.
12. The next step is to construct the wrist band. Cut out a piece of fabric that is about 3" wide by 11" long. Iron or sew interfacing to the wrong side of fabric. Next, fold the fabric with the right sides together lengthwise. Stitch, then turn the fabric right side out. I really dislike this part of the operation:(. Once the fabric is turned iron it flat with the seam in the middle. You are now ready to attach the band to the clutch.
13. Pin or baste stitch the folded band to the clutch. See picture below for placement of band.
14. Now the fun part of sewing the clutch. Line up the jeans fabric together with right sides together and the lining fabric right sides together. Pin it together. When pining the lining together leave about 4" of opening at the bottom of lining for turning the clutch out at the end.
15. Stitch the enter clutch together using a 1/4" seam. Don't forget to leave an opening in bottom of lining to turn the purse out through.
16. After the sewing is done reach through the lining and pull the clutch through the hole. Another suggestion is to leave the zipper open half way. It's a real pain to try to pull the clutch through the hole only to get stuck when the zipper is closed all the way.
17. Almost done with the sewing. Pin and stitch the opening in the lining closed. Once the lining hole is closed stuff the lining back inside the clutch.
 |
| Here is the finished clutch. |
|
 |
| Here is the finished clutch with our fabulous lining. |
|
I hope you all like my new design on upcycling worn out jeans. Let me know what you think.